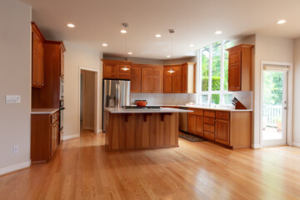
Cabinet Refinishing San Jose CA is one of the most cost-effective ways to dramatically change your cabinets’ look. The process is less involved than painting and requires no stripping.
Refinishing dark cabinets to lighten them is a challenging task that requires patience. You must work in a well-ventilated room with chemical strippers and chlorine bleach, so you must wear protective gloves and long sleeves.
If you love the layout of your cabinets but want to update their aesthetic, a fresh coat of paint is an affordable way to make them look brand new. It’s a relatively quick and easy process, especially if the original cabinets are in good condition. Before you start painting, it’s important to prepare the cabinet surface by sanding and patching any imperfections. After sanding, wipe down the cabinets with a damp cloth or tack cloth to remove all of the dust before moving on to painting. Any lingering particles could waft into the paint and ruin your pristine finish.
While some people can paint their own cabinets, this is a task that’s best left to a professional. A reputable contractor will have years of experience and a strong portfolio. They’ll also carry liability insurance and workers’ compensation to protect you in case of an accident. Using a professional will ensure that the job is done right the first time, minimizing costly mistakes down the road.
In addition to their expertise, a professional cabinet painter can take into account current design trends and color concepts to create a harmonious visual symphony. Choosing the perfect colors is an essential part of this process, and the right shades can elevate your home’s aesthetic and increase its value.
When you’re ready to choose a color, experts recommend testing it on a poster board before applying it to your cabinets. This will help you get an idea of how it will look in your space and give you a chance to make any necessary adjustments.
After you’ve selected your color, a qualified cabinet painter will carefully clean the cabinets before they begin painting. This includes scrubbing the surfaces with an abrasive pad dipped in degreaser. This step is crucial to ensuring that the new paint will adhere properly.
A reputable cabinet painter will also prep the cabinetry for painting by sanding the surface and filling in any holes or dents. Once the cabinets are prepped, they’ll be washed and vacuumed to remove any remaining dust or dirt particles. They’ll then tape off or cover countertops and other surfaces that shouldn’t be painted, like range hoods and backsplashes. They’ll also use a tarp or drop cloth to protect flooring and furniture from drips and splatter.
As a popular alternative to paint, stain enhances the natural wood features of your cabinets. A light-colored stain will bring out the grain patterns and hues of your cabinet doors, allowing you to create a custom look that suits your kitchen style. Stains can be applied to wood or MDF cabinets, but are typically used with natural wood. It’s important to thoroughly clean your cabinets before applying a new stain. This is especially true for the kitchen, where grease and dirt can build up. Using TSP (trisodium phosphate), which is available as a ready-made spray or as a powder to be mixed with water, can help to remove grease and grime before applying your stain.
It’s also important to sand the surface of your cabinet before staining, so that you don’t end up with an uneven finish. However, this doesn’t mean that you have to strip your entire cabinet; just lightly sand the surfaces where paint or stain has been previously applied and then wipe the bare wood down with alcohol to remove any dust, oil or dirt.
A great benefit of stain is that it doesn’t steal the spotlight from the natural beauty of the wood. Stains are generally thinner than paint, which allows the natural character of the wood to show through. This means that you’ll be able to see the unique grain pattern and color of your cabinet doors, which is an attractive feature for many homeowners.
Because of this, stains can work well for a variety of design styles, from traditional to modern. For example, a honey-toned stain like KraftMaid Honey Spice can add warmth to a room with light neutral paint colors such as Cottage or Riverbed. Meanwhile, a rich brown stain like this one from indianakitchencompany can complement darker accent colors like black or even stark whites.
If you’re looking for a more subtle finish, you can use a glaze to highlight the nooks and crannies of your cabinet doors. Glazes are similar to stains, but they contain much more pigment or dye and less binder material. A glaze will sit on top of your cabinet, rather than penetrating into it, highlighting the crevices and grain of the wood underneath.
When you are refinishing cabinets with veneer, you should make sure to carefully sand them. This is important to remove the old paint and allow the new paint to adhere properly. This will also reveal the wood grain underneath and give the cabinets a beautiful look. It is recommended to use a fine grit sandpaper so you don’t damage the thin veneer layer.
Veneers are a great option for cabinet refinishing because they offer the beauty of natural wood at a much more affordable price than solid wood. They are available in a wide range of wood species and grains, making it easy to find a color and style that will complement your kitchen décor. Veneers are also more durable than painted cabinets, and they are less prone to chipping and peeling.
If you’re planning to stain your cabinets, it’s important to apply a primer before applying the stain. This will help ensure that the stain sticks to the cabinets and doesn’t flake or crack. It is also important to follow the stain manufacturer’s instructions when applying the stain. After the stain has dried, you can apply a clear coat sealer to protect it from future wear and tear.
While painting cabinets is an inexpensive way to refresh your kitchen, it can be time-consuming and labor-intensive. Hiring professionals can save you time and money, while ensuring that the job is done correctly.
If your cabinets are made from plywood or MDF with solid hardwood face frames, you can replace the doors and drawer fronts to give your kitchen a fresh, updated look. It’s important to choose high-quality hardware and hinges for the best results. Choosing the right knobs and handles will help you achieve the look you want for your kitchen.
While wood veneer is not as strong as solid wood, it offers the same look and feel. To create wood veneer, real wood is cut into thin sheets and then bonded to a substrate. Unlike solid wood, which can warp or split in large panels, veneer is more stable and less prone to damage. It is also a good choice for incorporating exotic woods that are too expensive to use in solid wood cabinetry.
Polyurethane is a tough plastic that can seal and protect surfaces from scratching, denting, and chipping. When used on cabinets, it can cut down on wear and tear and keep them looking new for longer. It’s easy to put on; fairly fast-drying; super-resistant to water, chemicals, and other substances; and comes in a variety of sheens – from satin to high gloss. It’s also available in both oil-based and water-based formulations.
The first step in applying a polyurethane finish is to sand the surface of the cabinet to create a smooth, even texture. Once the sanding is done, the finish can be applied using one of three methods: brush on, wipe on, or spray on. Each has its own advantages and disadvantages, so it’s important to choose the method that will work best for your project.
Brush on application is the most common and allows for control over the amount of finish that’s applied to the surface. However, it can leave visible brush marks, so a natural bristle brush is recommended to avoid this problem. Wipe on application is faster and more convenient, but it can leave uneven streaks. It’s also more likely to contain airborne particles, so it’s important to use a mask when using this method. Spray on application is the fastest and easiest way to apply a polyurethane finish, but it’s not recommended for beginners or those without experience using this technique. It requires a special respirator, so it’s essential to read the label and follow all safety instructions carefully.
Once applied, a polyurethane finish will provide a glossy, hard sheen that’s resistant to scuffs, scratches, and dings. It’s also waterproof and has UV-resistant properties, so it’s a great choice for areas that are regularly exposed to sunlight.
The main ingredients in a urethane are di- and tri-isocyanates and polyols, with other additives that aid in processing or modify its properties. The polyols are often based on petroleum or vegetable oils, while the isocyanates can be made from aliphatic or aromatic compounds. The most commonly used are toluene diisocyanate (TDI) and methylene diphenyl diisocyanate (MDI). It’s important to remember that these chemicals are harmful if inhaled, so it’s vital to wear protective equipment when working with them.